Learn How to Convert ZBrush VDM Brushes to Blender
Now that Blender supports VDM brushes, we highly recommend that you convert your ZBrush VDMs to Blender! In this tutorial, you'll learn how to convert ZBrush VDM brushes to Blender.
In ZBrush
Load the VDM brush you want to convert, in this case the Ears from the FlippedNormals Face VDMs.

Brush - To Mesh
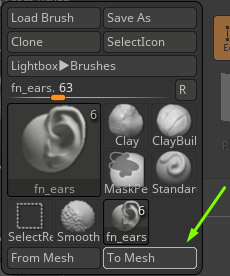
We'll need to turn this mesh into a VDM texture which we can use in Blender. Before we do that, make sure to bake all Layers and delete Subdivisions on your current tool.
Go to Texture - From Mesh to turn the mesh into a VDM map.
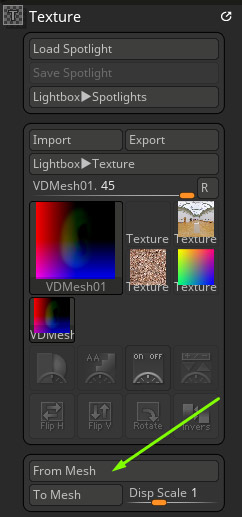
In this case, you can see that there's a red and blue gradient. To remove these, we'll need to flip the mesh on specific axis. Which axes depends on your model. You can also hit Ctrl Shift Y to quickly turn the mesh into a map.
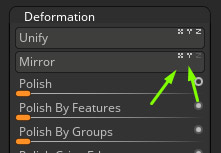
Red - Mirror on X
Blue - Mirror on Y
In my case, I'll have to mirror on both X and Y.
You mirror the tool by going to Tool - Deformation
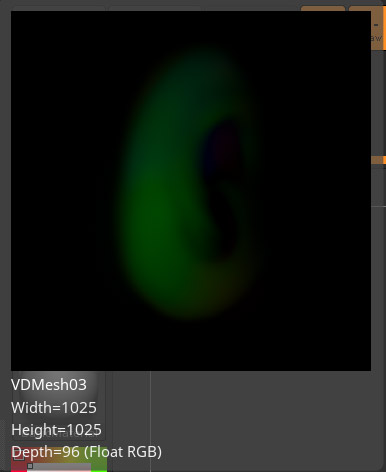
What my map looks like after I've mirrored it correctly.
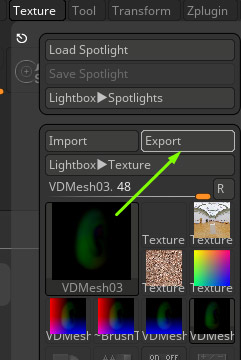
Select the Texture and Export as 32 bit EXR
In Photoshop
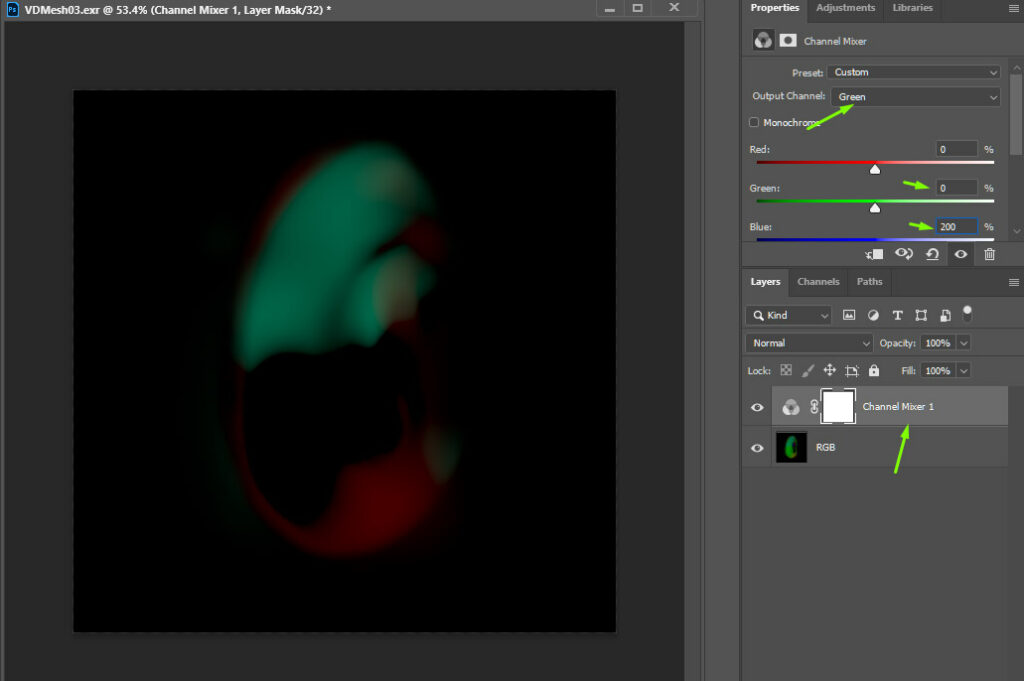
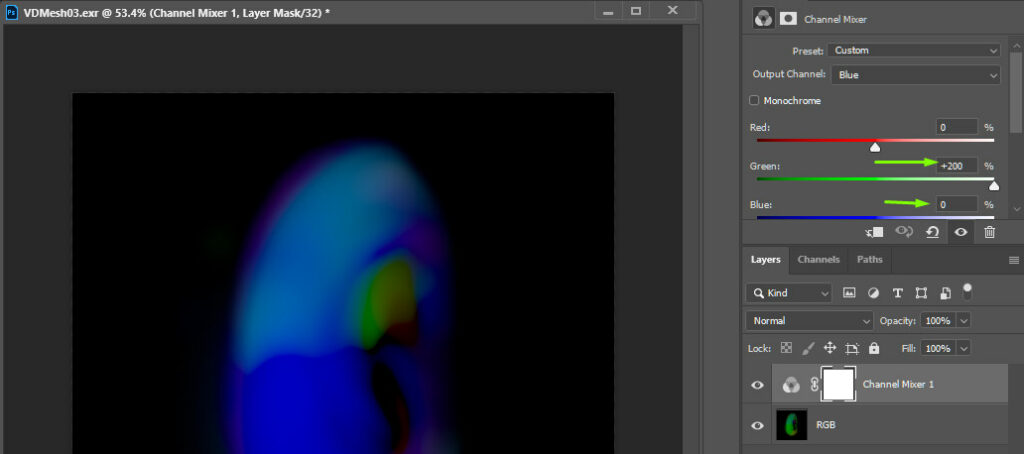
We need to swap the green and blue channels and boost them to 200%
In Channel Mixer, go to Green and set it to 0 and set Blue to 200. Do the same for Blue to green.
Flatten the image and save the map as EXR. If you're converting huge VDM packs, I recommend making an action for this and using the Batch feature in Photoshop to quickly process lots of images. I had to convert 50 images for the FlippedNormals VDMs and actions and batching saved me hours of time.
The maps are now ready for use in Blender!
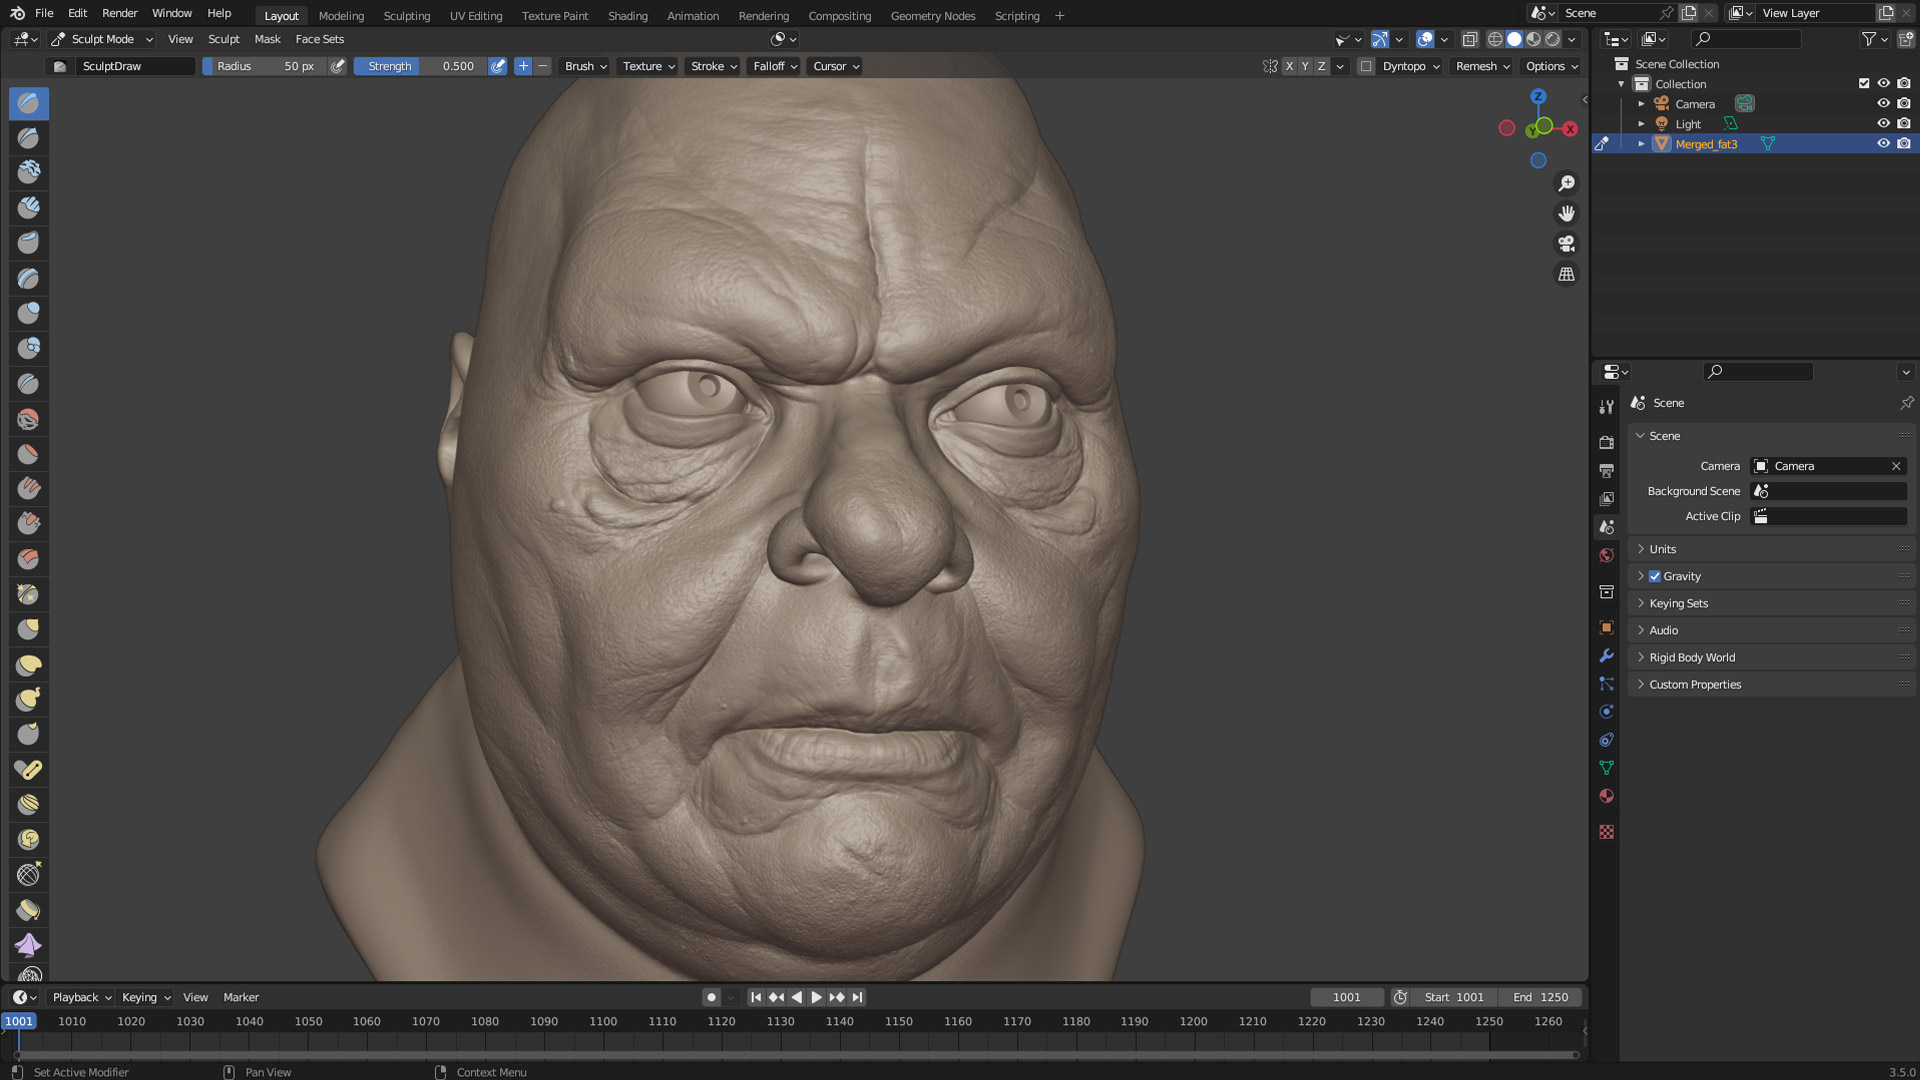
In Blender
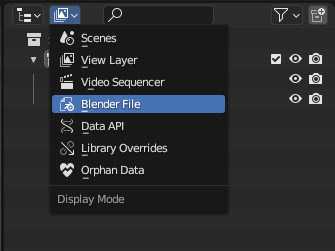
In the top of the Outliner, change the Display Mode to Blender File
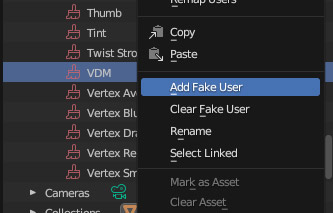
Select SculptDraw and Ctrl C/Ctrl V to duplicate it. Rename it to 'VDM'
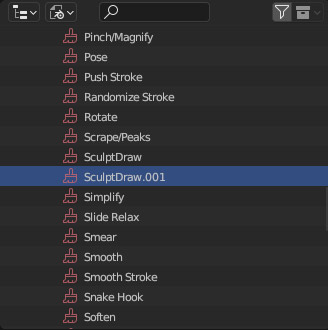
Right Click on it and select Add Fake User. If you skip this step, the brush will be deleted the next time you open up Blender.
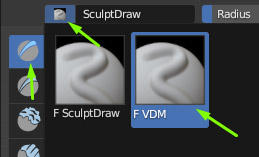
Select the SculptDraw brush and then select the new VDM brush in the window.
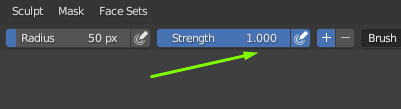
Select the VDM Brush and enable the following settings:
Change the Strength to 1
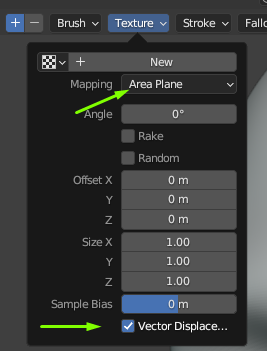
Mapping: Area Plane
Make sure Vector Displacement is Checked
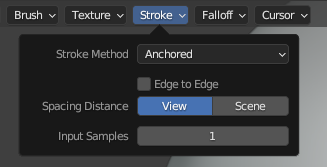
Stroke Method: Anchored
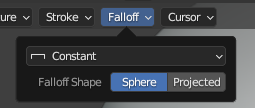
Falloff: Constant
Go to the Texture Properties for the brush and click on New
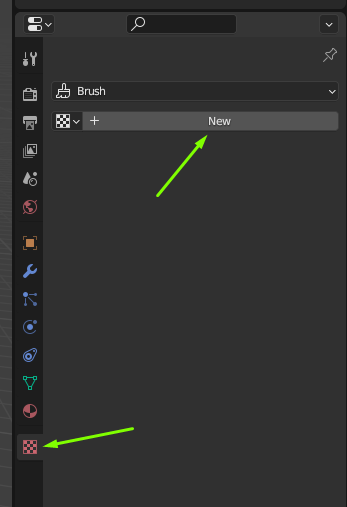
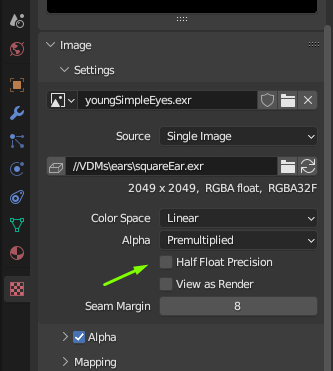
Image - Settings - Open and select the VDM you want to use
Make sure that Half Float Precision is unticked. This button will make the maps into 16 bit maps instead of full 32 bit ones.
Save this scene and supply it with your VDM maps. The users can now easily load the VDM map they want to use instead of having to set up the brush from scratch.
We highly recommend that you convert your ZBrush VDMs to Blender and hope that his tutorial helps!