ZBrush to Arnold Vector Displacement Tutorial
Setting up a vector displacement map is similar to a normal displacement map, but with some key differences. In this tutorial, you'll learn all the steps for setting up a vector displacement map from ZBrush in Arnold with UDIMS. This only works in Arnold for Maya, as vector displacement maps are software specific. Vector displacement maps cannot be interchanged between for instance Blender and Maya.

Pros of Vector Displacement Maps
- Vector displacement are more accurate than regular displacement maps
- Can create shapes which are impossible with regular displacement maps
Cons of Vector Displacement Maps
- They are software specific and can't be used in different 3D software without re-extraction
- Can't be used to add details to your maps in texturing, which you can with a regular dispacement map
- More complicated to use, since you need to know the software specific settings
Model Requirements
To make vector displacement maps work, your model needs the following:
- Subdivisions in ZBrush
- UVs
- Clean topology
ZBrush Vector Displacement Settings:
We have to change the settings in 2 places, unlike traditional displacement maps.
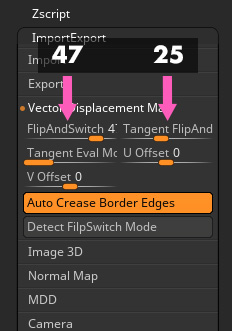
Go to Preferences - ImportExport - Vector Displacement Map
Change the following settings:
FlipAndSwitch: 47
TangentFlipandSwitch: 25
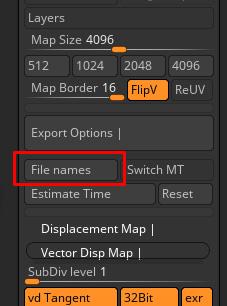
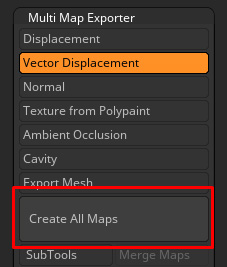
Go to ZPlugin - Multi Map Exporter

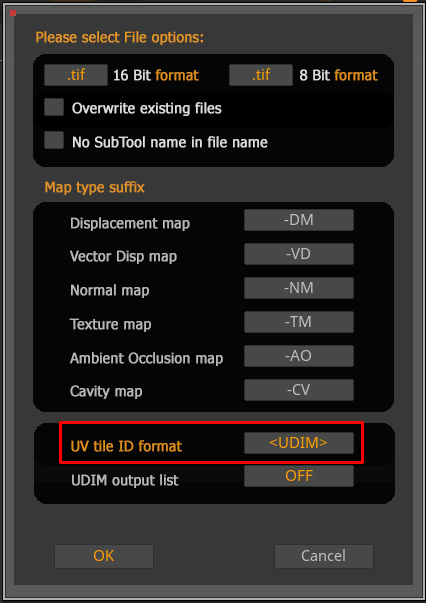
If your model has UDIMs, click on File names and then UV tile ID format until it says <UDIM>
Enable the following settings under Vector Disp Map. The SubDiv level should be the same as the subD level you're exporting from render. If you export level 1, you should set this to 1
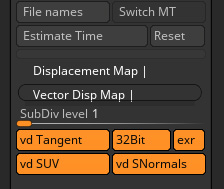
Hit Create All Maps and wait until the maps have been exported from ZBrush
Maya Vector Displacement Map Settings
The steps in Maya are split into two groups:
- Setting up the displacement texture map itself (file node and displacement node)
- Allowing the model to subdivide correctly (shape node)
Assign a material to your model and go to the ShapeGroup.
Add a File Node in the Displacement Mat. slot
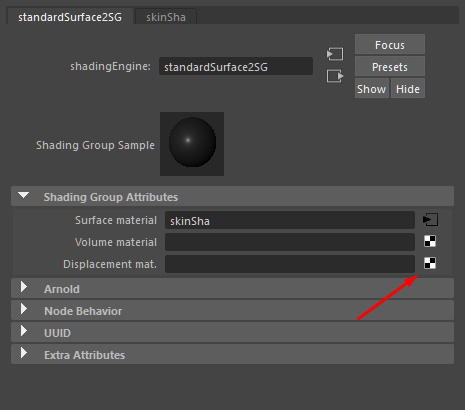
This auto creates a displacementShader for us.
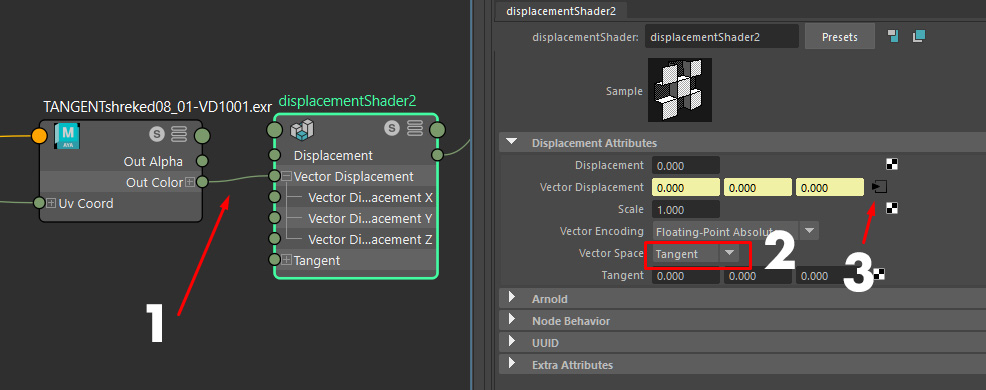
Plug the Out Color into Vector Displacement, cutting the Out Alpha to Displacement connection.
Change Vector Space to Tangent
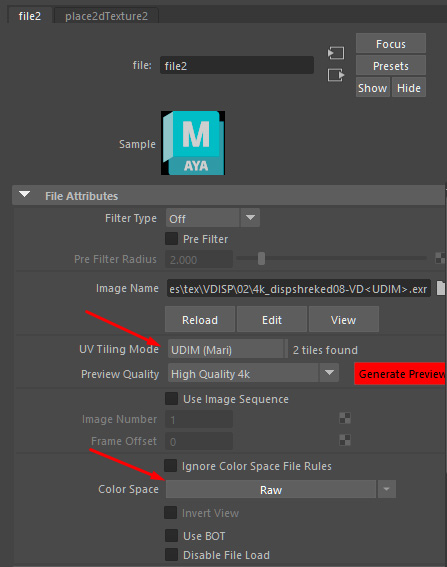
Continue to the file node by clicking where the 3-arrow is pointing
In the file node, set UV Tiling Mode to UDIM (Mari) (if you have UDIMs)
Change the Color Space to Raw. All data-maps (rough, disp, normal, etc) should always be set to Raw.
Go to the Shape Node of the model (it always has 'Shape' in the name)
Go to Arnold. This is where we find Arnold specific settings
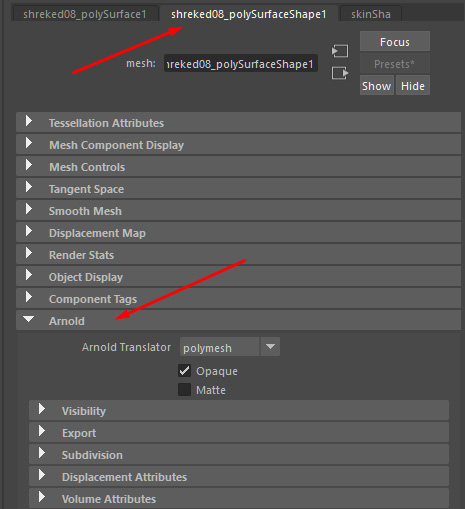
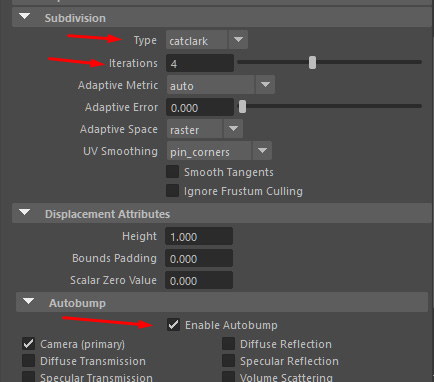
Under Subdivision change Type To CatClark
Iterations is how many times you want to subdivide the model. The higher the number, the more true it will be to your ZBrush model, but it's slower to render.
Under Autobump, check Enable Autobump (Autobump puts the high frequencies of a displacement map into the bump so that you do not need as many Subdivision Iterations)
Troubleshooting
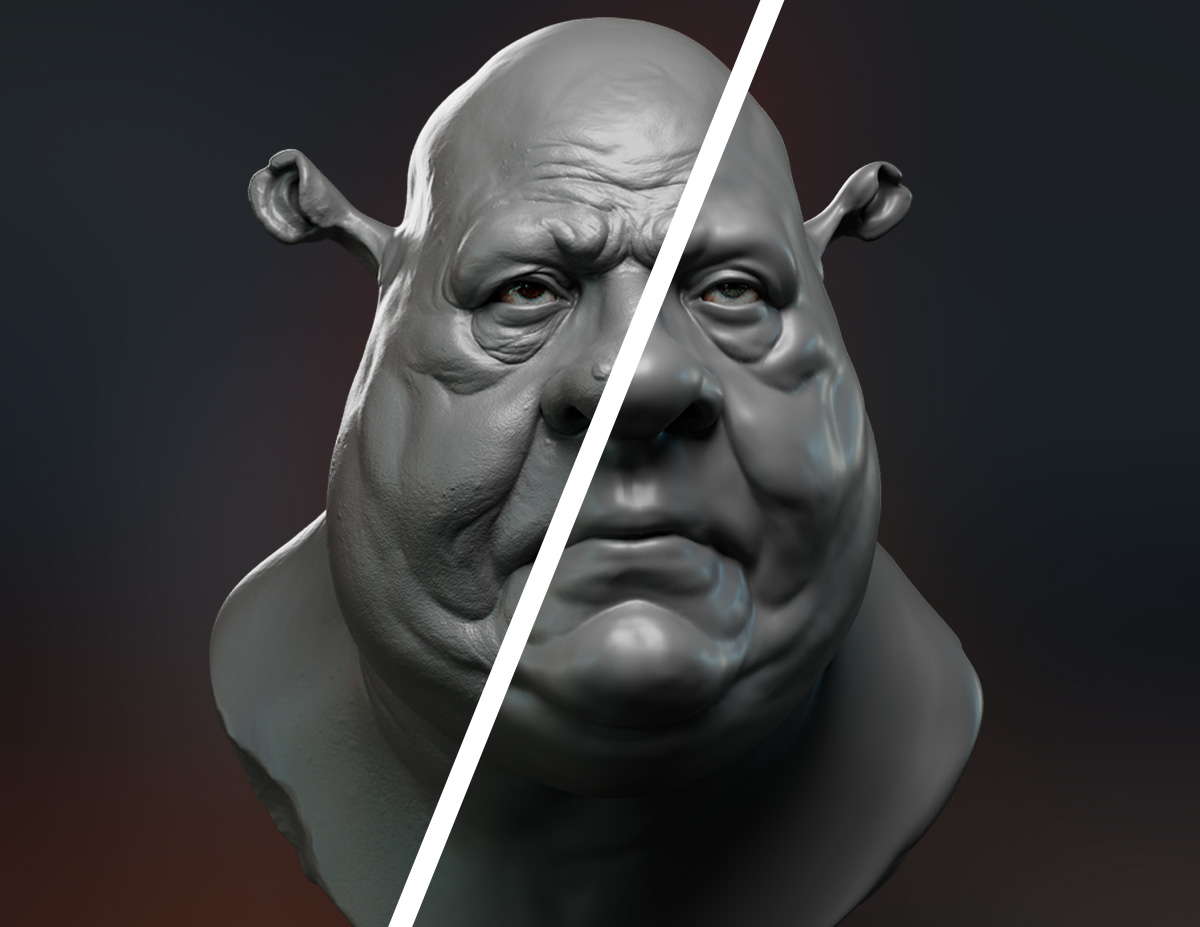
To troubleshoot issues, it's a good idea to export out a highres decimated model from ZBrush (in this case 1 mill polys). Soft shadows, reflections, noise and SSS can easily smooth out the look of your model, making it difficult to know if the details from ZBrush transferred properly in the vector displacement map. By using a decimated model, you have a clear standard to compare with.
If your model with a disp looks softer than it should, check the following:
- Correct color space (set to raw)
- Disp map is highres enough
- The mid value is correct
- Tangent is enabled in the ZBrush export settings
- The map is 32 bit